To generate the APK file or AAB.
If you are using a commercial Mionic edition (MAE or PE) you can generate the APK/AAB automatically with the Service APK/AAB Generator.
To manually generate the APK/AAB, follow these steps to generate it from the source files:
First of all you need Android Studio to generate the APK/AAB. If you haven’t already you will have to download and install it:
You need the Android Studio version 4+ (you can download it here). Follow the following process below to set up your Android Studio. (You can check the version of your Siberian at the bottom of your backoffice)
Setting up Andriod Studio for Mionic Apps
Download the 4+ version of Android Studio: click here
Then install Android Studio.
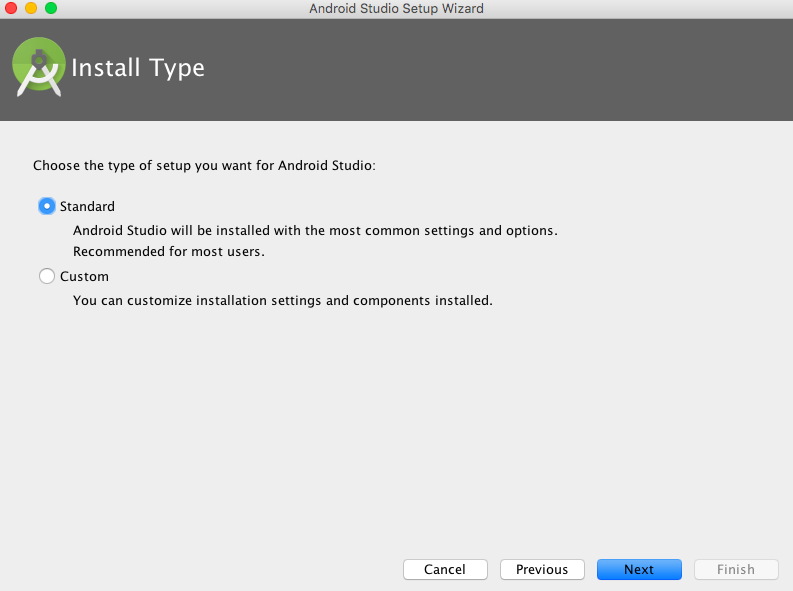
Choose Standard:
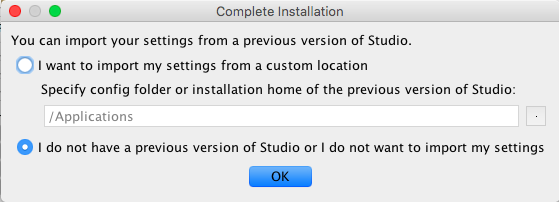
Select this setting (“I do not have a previous version of Studio or I do not want to import my settings”):
You are good. Now you have to create APK/AAB.
How to create an APK/AAB
Note: don’t forget that you have to configured Firebase for Android push notifications on your backoffice prior to generate the app sources and create your APK/AAB. Here is our article about Android push notifications.
From your App Editor go to publication tab, and scroll down to Mobile Source Code. Press "Generate source code".

Status is change to "Generating" (see below screen shot). Note: It can take upto 3min to generate the source code.

Refresh the screen and down the source code zip file. Unzip this file.
Then go back to the main menu of Android Studio:
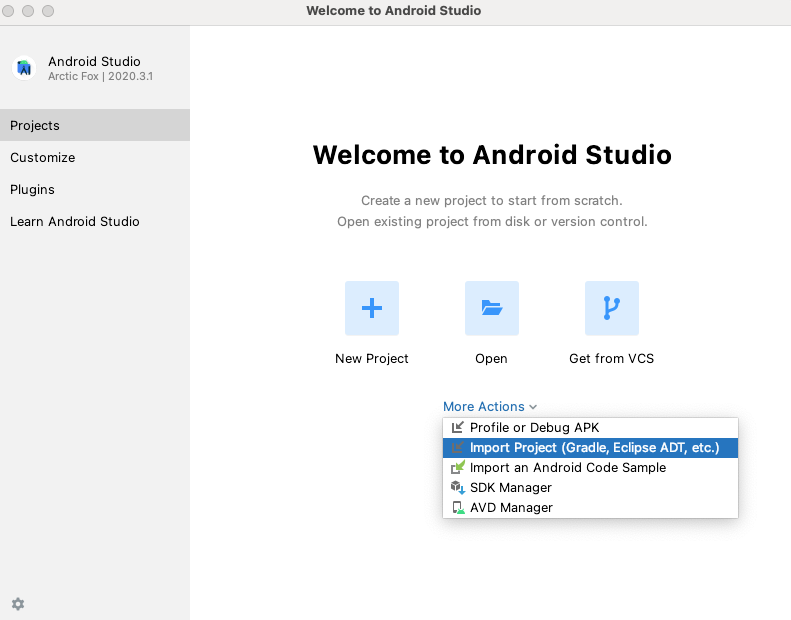
Click on “More Actions” > “Import project“.
Then choose the Android Source folder you have unzipped, and click on “Open“.
Do not update Gradle if Android Studio asks you.
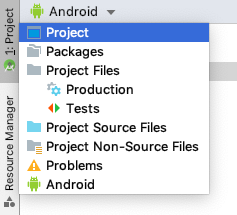
When your project is imported, from the left menu, click on Project and select Project in the list to display your folder “android_source” and open the tree.
From the main menu click on Build > Generate Signed Bundle / APK…
Select Android App Bundle or APK:
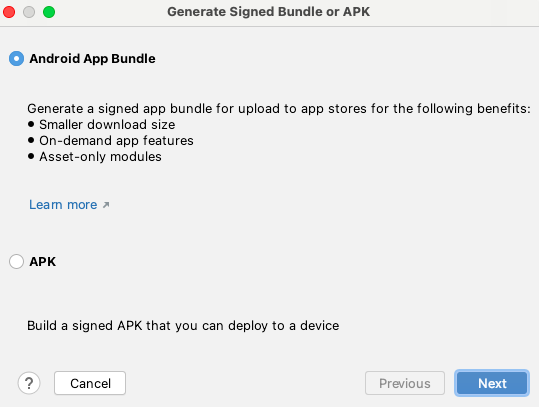
Then, click on Next and you get this screen:
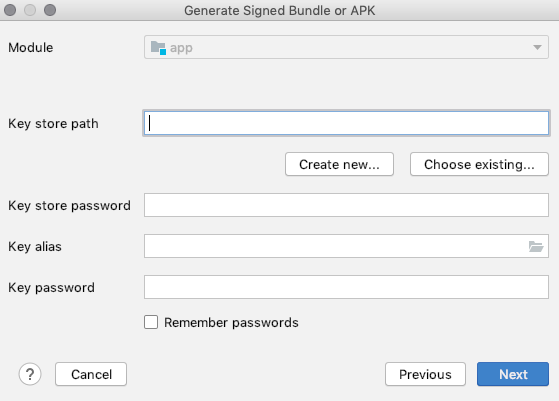
Depending if it’s an update of an app already published, or a new app choose:
– “Create new“, if it’s a new app
– “Choose exiting“, if it’s an update of an app already published
(In this tuto, we are going to see the first case, but second case is almost the same.)
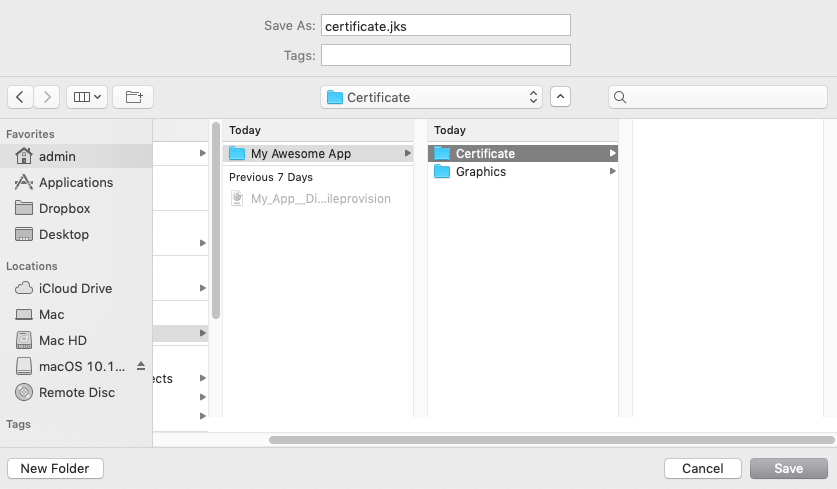
Okay, so you have chosen “Create new“. Now we suppose that you are someone very organized, and thus that you have already create a folder for your app publication on your computer. Before having downloaded the android sources file, you have created a folder on your computer named “My Awesome App”, for instance, with two subfolders: one for the graphic items, like screenshots of this app, and one for the certificates which will be named “certificate”. Thus, on your computer we have a folder named “My Awesome App” with the subfolder “certificate” and the other subfolder “graphics”.
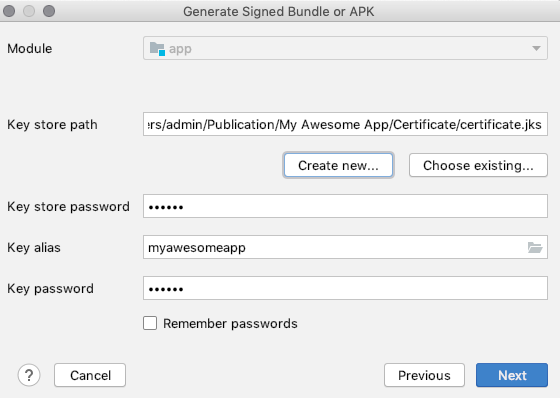
Okay now let’s go back to Android Studio. You have clicked on “Create new“, and you get this screen:

Now click on the button to browse in your computer folder and go to the “Certificate” folder, in the main folder “My Awesome App”, enter “certificate.jks” in ‘Saves As:‘ field, and click on Save:
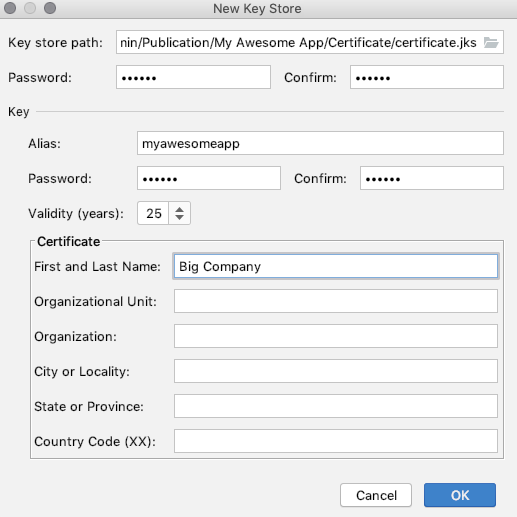
Enter a password for the Key Store, enter an alias name (the name of the app is OK), and a password for the Key Alias, set the validity period to 25 years, and enter the name of the app owner. Then click OK:
In the summary screen click Next :
Then in the next screen, choose “release” for Build Variants and click on Finish.
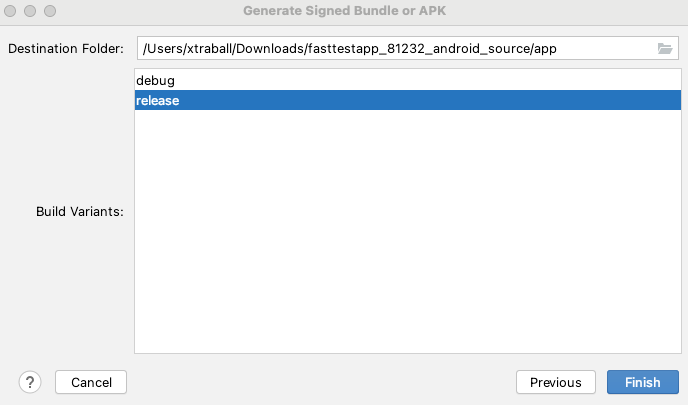
The generation of your AAB/APK will begin.
NOTE:
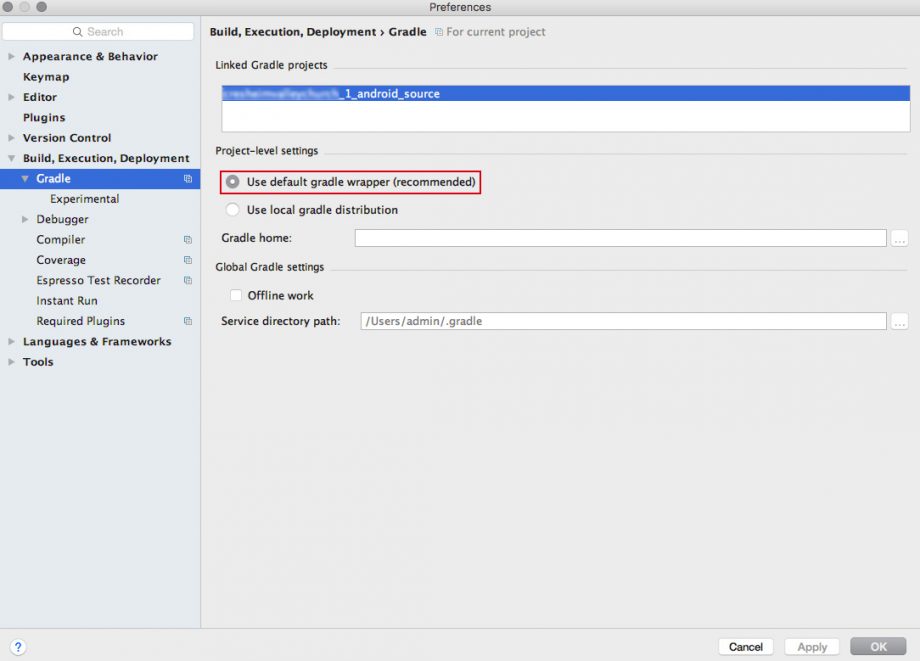
From Android Studio 2.0 you can encounter the error “Error:’com.android.build.gradle.BasePlugin’ does not implement the Plugin interface.”. To fix this problem, just go in the menu of Android Studio in Preferences > Build, Execution, Deployment > Gradle, and then check the option “Use default gradle wrapper” like in the image below:
Once the AAB/APK is generated, you can follow this documentation to publish your app on the Google Play Store
